PIX Payment Integration
PIX is Brazil's instant payment platform, launched on 16 November 2020 and operated by the Central Bank of Brazil. It supports fast transfers and payments 24 hours a day, 365 days a year.
Every PIX transaction is authorised by scanning a QR code that encodes the payment details. The customer must confirm the transaction on a mobile device.
Netvalve offers two integration modes:
| Mode | Description |
|---|---|
| Option 1 — Hosted Payment Page (HPP) | Netvalve renders the QR code inside its own checkout page. Your server only needs to create the order and redirect the customer. |
| Option 2 — Merchant Hosted | Your front end renders the QR code directly. You receive the QR image in the order response and are responsible for expiry handling. |
High-level user flow
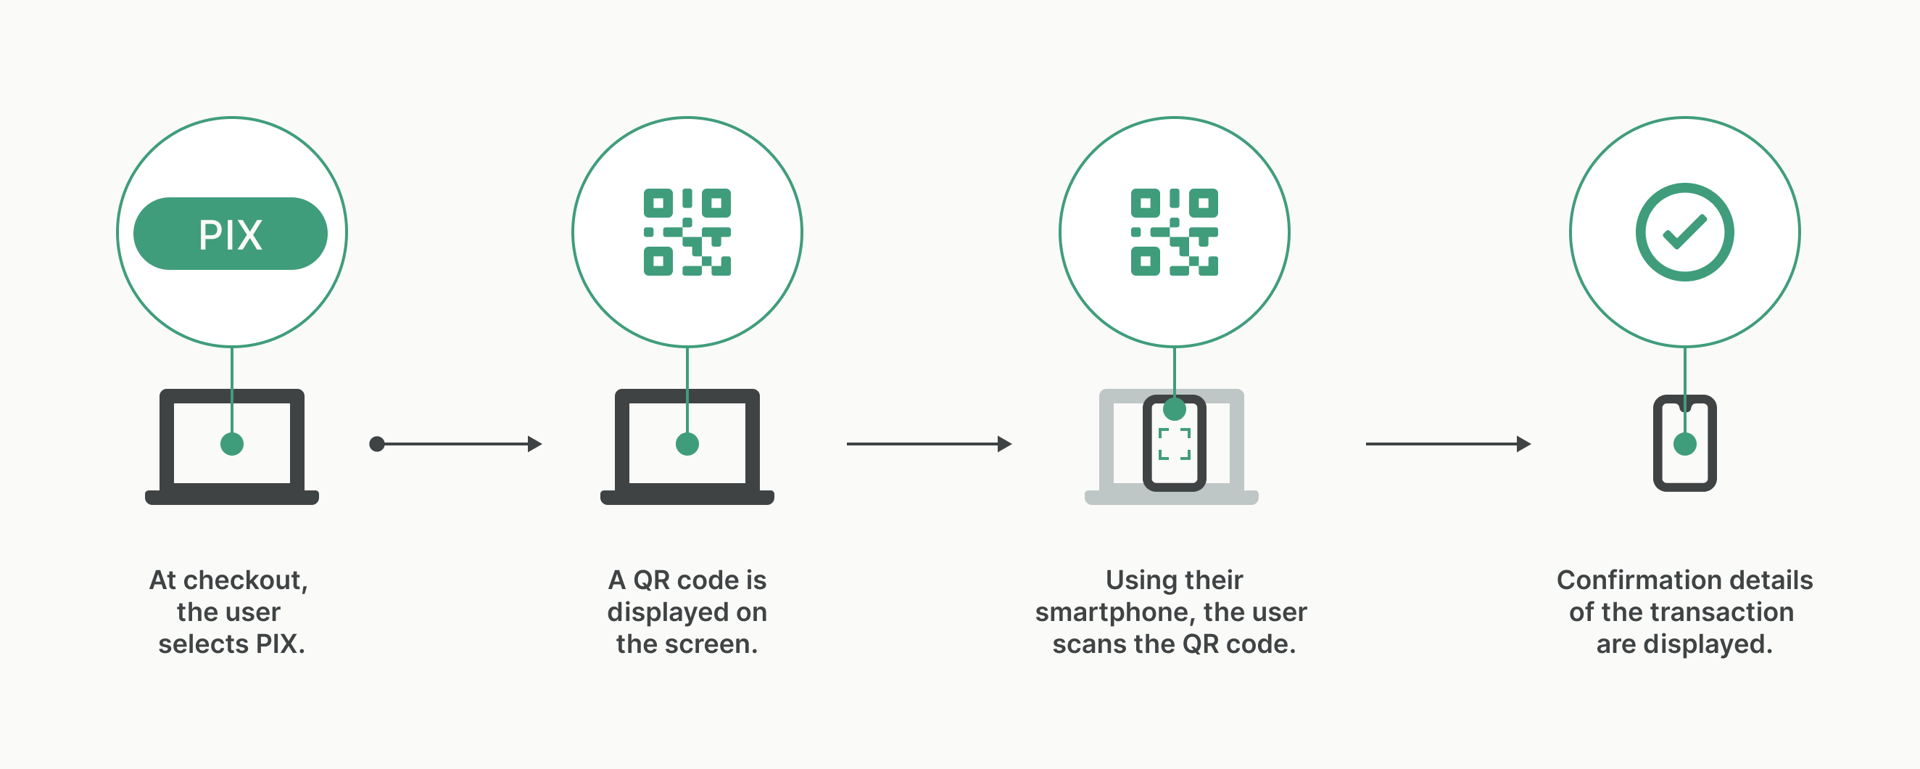
Option 1 — Netvalve Hosted Payment Page
Your server creates the order, redirects the customer to Netvalve's checkout, and receives the outcome via redirect URLs and an optional webhook.
Step 1 — Create the order
Send a POST request to the Create Order endpoint. Include the alternativePaymentMethod object with the customer's PIX details.
{
  "amount": 44.99,
  "currency": "BRL",
  "netvalveMidId": "f76fb7ed-3312-4791-a216-45918f899271",
  "clientOrderId": "{{clientOrderId}}",
  "orderDesc": "Order for Apple 14 Pro",
  "successUrl": "https://merchantsite.com/success.html",
  "cancelUrl": "https://merchantsite.com/cancel.html",
  "failedUrl": "https://merchantsite.com/failed.html",
  "pendingUrl": "https://merchantsite.com/pending.html",
  "paymentOption": "apm_pix",
  "alternativePaymentMethod": {
    "paymentMethod": "pix",
    "userType": "n",
    "documentType": "cpf",
    "documentNumber": "12345678901",
    "socialName": "Pablo Castro",
    "fiscalCountry": "Brasil",
    "payerEmail": "payer@example.com",
    "payerPhone": "3001234567"
  },
  "customerDetails": {
    "customerAddress": "Av. Paulista, 1000",
    "customerCity": "São Paulo",
    "customerCountryCode": "BR",
    "customerEmail": "customer@example.com",
    "customerIp": "123.123.123.123",
    "customerName": "John",
    "customerLastName": "Doe",
    "customerPhone": "11987654321",
    "customerState": "SP",
    "customerZipCode": "01310-100"
  }
}
alternativePaymentMethod fields
| Field | Required | Description |
|---|---|---|
paymentMethod | Yes | Always "pix" |
userType | Yes | "n" = natural person · "j" = juridical / company |
documentType | Yes | "cpf" (individuals) or "cnpj" (companies) |
documentNumber | Yes | 11-digit CPF or 14-digit CNPJ (digits only) |
socialName | Yes | Customer display name |
fiscalCountry | Yes | "Brasil" |
payerEmail | Yes | Payer's email address |
payerPhone | Yes | Payer's phone number |
Step 2 — Redirect the customer
On a successful order creation the response contains a redirectUrl. Send the customer there to complete payment.
{
  "traceID": "98e151b7-fca4-4e2a-8597-ab58512f2d41",
  "responseTimestamp": "2025-09-09T06:54:38.626+00:00",
  "orderId": 123445,
  "transactionID": "txn-98e151b7",
  "responseCode": "GTW_1000",
  "responseMessage": "Transaction Approved / Request Successful.",
  "orderState": "CREATED",
  "redirectUrl": "https://checkout.uat.sandbox-netvalve.com?paymentToken=eyJ...",
  "midId": "mid-4521",
  "netvalveMidId": "f76fb7ed-3312-4791-a216-45918f899271"
}
- Verify
responseCode === "GTW_1000"before redirecting. Any other code means the order was not created. - To pre-select PIX on the hosted page, append
&paymentOptions=pixtoredirectUrl.
Step 3 — Handle the redirect outcome
After the customer completes (or abandons) the payment, Netvalve redirects them to one of the URLs you provided in the order:
| Outcome | Redirect target |
|---|---|
| Payment succeeded | successUrl |
| Customer cancelled | cancelUrl |
| Payment failed | failedUrl |
| Payment pending | pendingUrl |
Step 4 — Receive a webhook (optional)
Netvalve can notify your server via a server-to-server POST when payment status changes.
Webhook endpoint configuration is managed by the Netvalve team. See the Webhook Message guide for the full payload schema.
Exception handling
If your server never receives a redirect or you need to verify the final status, call the Inquiry API.
{
  "traceID": "965c2c75-b29d-41fc-aa3a-6d40b9f3fbb0",
  "responseTimestamp": "2024-04-25T13:48:49.959+00:00",
  "transactionID": 22,
  "responseCode": "GTW_1002",
  "responseMessage": "Transaction status is Pending.",
  "responseCodeType": "PENDING"
}
If the response is PENDING, wait briefly and re-poll. See the Swagger API reference for the full Inquiry API schema, and the Error Codes reference for all responseCode values.
Option 2 — Merchant Hosted
Your front end is responsible for displaying the QR code, showing a countdown to expiry, and handling the case when the code expires.
Step 1 — Create the order
The request is identical to Option 1 with one addition: set "paymentMode": "direct".
{
  "paymentMode": "direct",
  "amount": 44.99,
  "currency": "BRL",
  "netvalveMidId": "f76fb7ed-3312-4791-a216-45918f899271",
  "clientOrderId": "{{clientOrderId}}",
  "orderDesc": "Order for Apple 14 Pro",
  "successUrl": "https://merchantsite.com/success.html",
  "cancelUrl": "https://merchantsite.com/cancel.html",
  "failedUrl": "https://merchantsite.com/failed.html",
  "pendingUrl": "https://merchantsite.com/pending.html",
  "paymentOption": "apm_pix",
  "alternativePaymentMethod": {
    "paymentMethod": "pix",
    "userType": "n",
    "documentType": "cpf",
    "documentNumber": "12345678901",
    "socialName": "Pablo Castro",
    "fiscalCountry": "Brasil",
    "payerEmail": "payer@example.com",
    "payerPhone": "3001234567"
  },
  "customerDetails": {
    "customerAddress": "Av. Paulista, 1000",
    "customerCity": "São Paulo",
    "customerCountryCode": "BR",
    "customerEmail": "customer@example.com",
    "customerIp": "123.123.123.123",
    "customerName": "John",
    "customerLastName": "Doe",
    "customerPhone": "11987654321",
    "customerState": "SP",
    "customerZipCode": "01310-100"
  }
}
"paymentMode": "direct" is required. Omitting it causes Netvalve to fall back to the Hosted Payment Page flow.
Step 2 — Receive the QR code
The order response includes the QR code as a base64-encoded PNG image and its expiry timestamp, both inside apmPaymentInfo.
{
  "traceID": "1b196e16-3a62-4116-947a-13d32400219f",
  "responseTimestamp": "2026-05-04T09:02:44.402+00:00",
  "transactionID": 10221,
  "responseCode": "GTW_1002",
  "responseMessage": "Transaction status is Pending.",
  "responseCodeType": "PENDING",
  "isRetryAllowed": true,
  "paymentMethod": "APM",
  "bankTransactionId": "b3ea62f3-823f-4152-90f0-94625ab87349",
  "midId": 500,
  "netvalveMidId": "5c9f43e2-0317-44ab-b169-b2a84ab9598c",
  "processor": "PIX",
  "amount": 250.00,
  "currency": "BRL",
  "transactionType": "SALE",
  "apmType": "PIX",
  "apmPaymentInfo": {
    "qrCode": "<base64-encoded PNG>",
    "qrCodeExpiry": "2026-05-04T09:07:41.019795"
  }
}
| Field | Type | Description |
|---|---|---|
apmPaymentInfo.qrCode | string | Base64-encoded PNG of the QR code |
apmPaymentInfo.qrCodeExpiry | string | ISO 8601 UTC timestamp when the QR code expires |
Step 3 — Display the QR code and handle expiry
Decode the base64 string and render it as an image. Show a live countdown to qrCodeExpiry so the customer knows how long they have.
<img
  src="data:image/png;base64,{apmPaymentInfo.qrCode}"
  alt="Scan this QR code to pay with PIX"
  width="200"
  height="200"
/>
QR codes typically expire within 5 minutes. If qrCodeExpiry is reached before payment is confirmed:
- Stop the countdown timer and hide the QR code.
- Prompt the customer to click a Refresh button.
- Re-call the Create Order endpoint to obtain a fresh QR code.
Step 4 — Receive the webhook
Once the customer completes payment, Netvalve sends a webhook to your configured endpoint. This is the primary signal that the transaction is complete.
See the Webhook Message guide for the full payload schema and signature verification instructions.
Related resources
| Resource | Link |
|---|---|
| Swagger API reference | API Reference |
| Webhook Message guide | Webhook Message |
| Error Codes reference | Error Codes |